Pages

Saturday, August 27, 2011

Christmas Wishes


Hello everyone.

I coloured Santa with copics then cut him out with nestabilites classic rectangles small, matted it onto the red layer by cutting a slightly larger rectangle 
I embossed the background layer with The Swiss Dots and Candy Cane embossing folders.
The Christmas tree is a Marianne Creatable die which I cut, then embossed. For the red layer behind the Christmas tree I did by placing the die onto the red card stock and tracing around it and then cut out with scissors.

Thank you for taking the time to visit.

Sunday, August 21, 2011

On the Fence

Happy Sunday Everyone.

Its a beautiful sunny day here today and as soon as I've updated my Blog I think I'm getting on my bike for a nice long ride.


For my card, I have taken Butterfly Nora and placed her onto the Field Fence coloured her with copics, added some yellow flocking powder to the small daisy's and the centres of the Retro flowers and some stickles to her wings then cut them out with the  Lacy Squares die.
The papers are from the Kaisercraft Miss Nelly Paper Pad.
The border punch is Martha Stewart's Eyelet Lace.
A rose made by me and some Retro Punch flowers, flat backed pearls and a bit of ribbon.

I'm entering my card into The sugar Bowls Challenge 65 - Maria  Therese's Sketch


Thank you for visiting today


Friday, August 19, 2011

Frangipani's and Quilting


Hello, 
My card today came from an idea that Angie had.
She thought it would be a good idea to cut a shape from card  ( I chose an oval but any shape will work) cut the the same shape from a piece of foam and then cover them both with a piece of fabric such as satin, then sew on some beads in  diagonal rows to give the effect of quilted paper, well the foam I had at hand was too firm and I couldn't get the beads to sit down into it, so I changed the foam to batting/wadding that you use for quilting and had a lot more success.
 I sandwiched the quilted piece between two pieces of card, cutting a scalloped oval from the top layer.
Added some little flowers I made from an egg punch, and a handmade rose.

Then I thought why not do the same thing but this time sew the diagonal lines with the sewing machine which I did on this next card, but I wish I'd left it at just one direction of rows as doing the second row tended to make the fabric pucker, or it could just have been me in my rush to try it out, any way I couldn't throw it out and had to use it on a card. Here it is with some Frangipani flowers I made quite some time ago but never found a use for.

Thank you so much for visiting today.


Saturday, August 13, 2011

Easel Swap


Hello My lovely Blog readers.

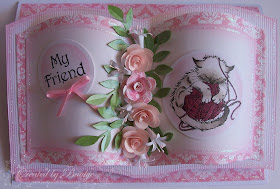
This card was made for a swap in the PENNY FLOWERS and Paper Crafts group I belong to.
Its been received now so I can show it to you.
The shapes were cut with a bookatrix board (which my lovely friend Angie cut for me) thank you Angie.
Angie is the owner of PENNY FLOWERS and Paper Crafts.
I added some Glitzin' glamour glitter glue around the edges of all the layers after I had sponged them with Memento Angel Pink.
The stamp is from Mo's Digital Pencil called Sinatra but in this case his name is Olly.
I coloured him with copics.
The roses are the Ultimate Rose designed by Angie and made by me and the leaves are Sizzlits Little Leaves.


Thursday, August 11, 2011

Cathedral Lace Frame

Good Morning

All the cards below were made using the Cathedral Lace Frame by Cheery Lynn.


For this one I placed the Cathedral Lace Frame from black card and placed it over a piece of acetate and then coloured sections of it with a mixture of sharpie pens and copics (whichever ones I could get to colour the best onto the acetate).


This one I cut the centre from and replaced it with the Lattice 2 Die
and the butterfly is from the Exotic Butterfly Small die set.
The leaves are Pair of Ferns and flowers made with the Retro flower punch.


And here I used the frame that was cut from the above one.
The flower was made from the Rose and Leaf die set.
The Cuttlebug embossing folder is Victoria.


Wednesday, August 10, 2011

Redwood trees


Hello Everyone.

The very talented Marianne Walker from I Like Markers showed how to colour these redwood trees, she also shares her drawing of them, so I just had to have ago at colouring them.
Mine is nowhere near as good as hers and I didn't have all the colours she used, but I'm reasonably happy with the way mine turned out.
I cut them out with Spellbinders Labels eleven then hand cut the layer behind them out and had to distress it a little as my hand cutting isn't the best.
I then placed them in between the two layers of Martha Stewart's Garden Trellis deep edge punch.
The sentiment is from a GinaK stamp set Tree  Silhouettes.


Thursday, August 4, 2011

Hi


Hi...........

This is another card made for FatCatsCardCorner using the Nellie Snellen Round Lily Multiframe Die set.
After cutting out the frames I then cut the centres out using circle nesties so I could lay them over my focal image and sentiment layer.
The flower is from the Basic Grey stamp set Sweet Threads and I stamped it three times, coloured it with Prisma pencils, added some glitter with a Sakura Clear Star pen, which doesn't really show up in my pictue, and then cut out different parts of the flower and layered them with dimensional tape.
For the background I cut out squares from two different designer papers from Kaisercrafts Empire Collection ( I've had these two sheets for some time so its probably not still available), and inked the edges with black Memento ink.

Thank you so much for stopping by.